Hi lovelies!
I know I have been missing for so long, and there really isn't much of an excuse aside from being incredible busy with school. Speaking of which I graduated last year with my Bachelor's and started this year on my Master's. So there is tons to talk about, but that will have to wait because today I have a tutorial for you.
So lately (as in the past couple of months) I have been heavily into makeup. I think my bank account, Ulta, and Sephora accounts can vouch for that! My weakness, admittedly, are palettes and minis. (I mean who can't pass up a tiny version of a makeup favorite??) I do have a few cumbersome singles floating about. I typically didn't have an issue with them...that was until I was trying to organize all my makeup into a more streamlined fashion and realized that they are just awkwardly in the way.
Cue the lightbulb! I figured that I have enough materials to make myself a Z-palette knock-off. What a great way to recycle the Ulta and Sephora boxes that somehow find themselves at my doorstep weekly (no judging, okay?) and to reduce the bulk of having many little cosmetic holders all over my tiny apartment bathroom.
If you'd like to see how I made mine, stick around after the jump!
Materials Needed:
- 4-5 pieces of cardboard roughly the same size (I used 2 pieces that were thinner than the rest)
- 1 piece of cardboard the same length as the bigger pieces but smaller width
- 1 large magnet sheet
- 2 smaller strong magnets or 1 small strong magnet and 1 small metal sheet/pad
- 3-4 pieces of large scrapbook paper (similarly can use contact paper)
- Clear vinyl, sheet of acetate/transparency film, or sheet protector (not shown)
- Modge-podge, masking tape, spray adhesive, E-6000, and/or hot glue (I used all.)
- Cutters (X-acto knife and paper scissors)
I wanted my palette to be a little on the bigger side, so I made mine roughly 10" by 7". I intended to use some contact paper also by it completely slipped by mind, and I didn't want to use the one I had at home. So I stopped by Hobby Lobby and purchased this gorgeous paper.
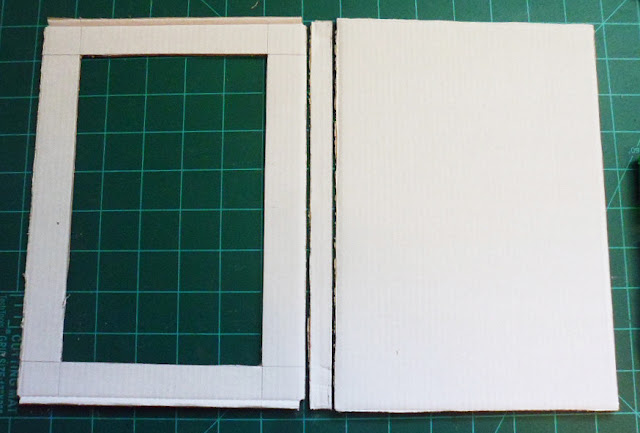
1. I took one of my thinner pieces (which I used as the covers) and measured in 1 inch from all sides, drew a rectangle and trimmed it away.
2. Similarly, I took 2 pieces of cardboard and measured 3/4" from each edge and repeated the process. I only used 2 pieces because I felt this was deep enough for my makeup pots. However feel the need to use another piece of cardboard if needed.
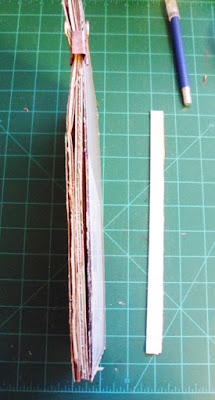
3. Stack up your bottom piece and the 2 pieces that you cut in #2 and measure how deep they are. You will need this measurement to make the spine (the smaller piece to the right.) Trim the spine from the smaller piece of card board that is left.
4. Before you start to make the frame for your palette, you need to measure your paper for both ends. Lay your top and bottom on your sheets of paper 1 inch from all sides and mark it. For the front piece, trace the inner window shape.
5. Line up your front cover, spine, and bottom cover with 1/8" to 1/4" space in between. Tape this down well on the front and back side.
6. Now measure out a thin piece of paper the same way you did with the covers, scoring it for the spine, and adhering it to the spine and wrapping the edges.
7. Now it's time to make the magnetic closure: Adhere your 2 center pieces together, one on top of the other. Determine which side you want facing outward and upward. On the right side in the center, mark the shape of your small magnet and start to chisel away at the cardboard until your magnet nestles flush with the cardboard and glue it in.
8. Mark your middle piece similarly to your top piece, marking 1 inch from all edges and tracing the center. Draw a large X in the center where the window is. Clip the outermost corners and cut the lines of the inner X. Make sure to score your lines to make it easier to fold.
9. I'm not sure why I don't have a photo of the process, but lay your center piece on top of its respective piece of paper and fold the outer corner toward the bottom. You can use Modge Podge or spray adhesive or whatever glue you have that works well. Then push through the X and wrap through the center toward the bottom and trim the excess. At this point you can leave the magnet covered or trim it out. I left it visible for the tutorial and later covered it over again. (You will see this a little more clearly in #11.)
10. Let's cover the bottom and add the magnet sheet. Take the sheet of scrapbook paper designated for the bottom and score the edges. Clip out the corners and glue down one side (the side that will face the spine.) Lay down your bottom and wrap the remaining edges and adhere. Trim your magnet sheet to cover the bottom and glue it down.
11. In the top part you will need to position a magnet out the outward facing lip in the center making sure that the polarity doesn't match that of the magnet in the center. Similarly you can use a metal bar here if you'd like. I ended up using a the base of a ring pad from a ring blank I had. Embed it in the cardboard as before. This piece will incorporate bits from the past few steps. Score the sides, clip corners, and glue down the side that will correspond to the spine. Cut the inner X that was drawn before. Adhere to frame work and wrap the outer edges first toward the inside, then wrap the window toward the inside and trim to match. Cover the inside of the spine with paper now.
12. Glue in your inner frame (the center) matching up the corners. I chose to seal my palette with Modge Podge to make it a little sturdier and water resistant before I added my plastic covering.
13. After your box dries, cut a piece of plastic 1/2" bigger on all sides than the window. I used clear vinyl because that's what I had readily available. You could also use transparency film, plastic from clamshell packaging, or sheet protectors. Glue it to the inside of the window.
14. Start de-potting your make up, and enjoy everything being in one place altogether!
Disclaimer: I'm sure there may be other ways and methods to making this, however, I wanted to use materials mostly found in my home. I would change a couple of things for next time: not forgetting to get contact paper (haha!), using E-6000 only instead of spray adhesive as well, using plastic sheeting instead of clear vinyl, and using foam core board for the inside rather than cardboard. Other than that, I wouldn't tweak it very much.
I hope you enjoyed the tutorial. I really enjoyed making it. Hopefully I will be back really soon with new updates and look into the things that I have accomplished while in my undergrad program. Oddly enough, I several drafts from the past couple of years that I just have not submitted. Hopefully I can get those completed and edited and submitted.
Thank you so much for stopping by. Please do let me know if you make one of these. I would love to see it!!!


No comments:
Post a Comment
I love comments! But then again who doesn't? Go ahead and drop me a line.