12.24.2013

Merry Christmas!

Oh my goodness!! This has been quite a few past months.  I have been so busy with school that I have barely had any time for much else.  I am so glad the semester is over, and I have a few weeks break before going back.

Let me just say how I have MISSED you all and blogging. I didn't expect to stray away for so long.  Unfortunately, to cram as much school work in as possible I have to be a tad bit more disciplined toward it.

Are you all ready for Christmas? I can't believe that it is almost here.  Seriously, only a day away!! I guess I'm as ready as I'll ever be.

So I have been working a few items for after the holidays.  I didn't get it ready in time for Christmas, but I think this break between semesters is a great time to catch up on my designing and sewing.  My sewing mood changes a little too quite frequently and honestly it drives me nuts and so I have to do things when the mood strikes me.  So lately I have been dabbling in all sorts of things.  But the most recent endeavors has included lots and lots of felt....

9.26.2013

Another One: Sewing Plans {Printable}

I really haven't had a heap of time to sit down at my sewing machine lately.  Instead I have been constantly on my computer typing and studying.  So that leaves lots of time to make documents that are sewing-related, right? Right!


9.17.2013

Where Have I Been + Free Printable


Hi, lovelies!  Oh my!!! It's been such an awfully long time since I've had time to blog.  I've wanted to, trust me.  I started back classes this fall at Auburn University after being out of school for 2 long years, and boy! is it an adjustment.  This college is so much bigger than the one I attended last.  With that being said, I haven't had much time to really do anything that I like concerning crafting or blogging because I'm usually always studying.


I have a textile class that I am in love with.  I had a project in there that dealt with making a swatch kit, and it got me to thinking about fabric organization (and how I really need to do some!)  Then I thought about how for years I had been wanting to do a fabric organization binder myself.  Obviously, I never got around to it.  Anyway, I sat down and created a fabric swatch sheet printable and I wanted to offer it.  It's away to say that I'm sorry that I've been gone for so long and that I really do miss you!!


It's nothing very special, and I'm sure there are tons out there that look much better than what I can offer.  However, this is something that I've really been wanting to do, and so here it is!

It features three places for swatches with fields like Fabric/Design Name, Content, Amount, and Notes.  The swatch square is approximately 2" by 2".  There is also an "Ideas" section at the bottom, in case you like to group together fabrics that are similar in colors or styles.


Download the pdf file here.  Simply print it on regular paper or cardstock, attach either a scrap of fabric or a photo of the fabric, and add your info.

I hope you enjoy! Let me know if this works for you. And...please send pictures if you use it to lani5287@yahoo.com.  Hopefully I won't be gone too long again!!!

7.15.2013

My First Ever Quilt: Chevron Vintage Sheet-Style

I wasn't going to post this until I revamped our picnic basket, but I'm super excited about the turnout!


Let me start off by reiterating that I am not a quilter, nor do I have the desire to be like the great many of you who are.  I applaud and adore your works and dedication to the craft.  It takes sheer talent to quilt.  I had to preface this post with that notice in the event you look at how wonky this quilt is and thought that I was trying to pass as a quilter.  

{Tutorial} : Simple Cardstock Mailer


I typically make my own mailers for when I ship packages to my customers.  I like making them myself because 1) they are inexpensive, 2)they are totally customizable, and 3) they are always readily available.  I whipped up a little tutorial to demonstrate my process.

Let's go!

6.21.2013

Follow Me on Bloglovin'

I have a question: although Google Reader is going, does that mean that FriendConnect(?) or the newsfeed on the Blogger Dashboard is going anywhere too?  I should really do my homework concerning this whole transition of blog feed.

I hardly ever look on Google Reader as is.  I typically just go to my dashboard and catch up day to day.  However I did join Bloglovin' a couple of months ago. From what I have seen, I like so far.  I rarely get onto it.  So if have Bloglovin' and you feel so inclined, Follow my blog with Bloglovin!

Follow on Bloglovin

I have even added a button for it on the sidebar.  It is the last button with the "b" and heart on it.  Now I'm off to go play around with the new blog feed website!  See you there!

6.20.2013

A Few Bad Habits to Break

Because I have been sewing a lot of garments for little miss and for myself lately (more on those later), I started thinking about some improper habits I have created out of mostly laziness and impatience but also out of limited time and materials.

Here's my effort to ward you away from making these same terrible mistakes.  These are in no particular order.

6.15.2013

Where Was All This Energy for KCWC?

I have been on a sewing and creating roll here this week!  I've made or done something creative nearly everyday this week.  I've been working on lots of things for my daughter; and though some things are finished, there are still some wips left to knock out.  I updated my blog a bit.  I hope you all like the way it looks now.  I feel it is a tad fresher and represents me more.

Well today I have for you two articles of clothing: one being a pencil skirt and the other being a cardigan.  Let's start with the skirt.( I must warn you; there are a ton of photos.)


6.10.2013

Vintage Sheet Storage

Although I have a two bedroom apartment, it's pretty small.  It's comfortable enough, but it could be a little bigger for my taste.  Being that it is on the tad cramped side, it doesn't leave much room for storage.  And honestly I have entirely too much stuff (shoes, clothes, fabric) to have packed in here.

My daughter's room is right across from mine; and in our makeshift "hallway" which really isn't, there is an alcove that is about a foot and a half deep and three feet wide.  I figured if I couldn't annex some space, then I should go vertical.  That's just what I did.


6.08.2013

Open-Back Girl's Shirt


You may not know this, but I'm not a fan of strapless and much less a fan of halter tops especially for my little girl.  I did, however, want to make a top (or dress) that was in some way crafted with her back out so that she wouldn't get so hot in the summer.  I took some inspiration from the open-back dresses that have been popping up EVERYWHERE and crafted this little open-back number for her.


6.04.2013

Repurposed: From Changing Table to Sewing Desk

A couple of weeks, okay more like a month and a half ago, I found this changing table sitting beside the dumpster at my apartment complex.  I immediately scooped it up.  I saw a whole new potential to this gem.  I called my mom and asked her if she could help me upcycle it, and the first thing out of her mouth was, "Are you trying to tell me something?!"  So after calming her fears that I was/am not expecting another child, I explained to her that I wanted to take it from its current terrible state to this awesome vision I had for it.

She never really did get around to helping me with it.  That was totally fine by me because when I'm ready to start working on something, there is no stopping me until I finish.

The whole process took longer and was harder work than I had anticipated.  That's okay; I like a good challenge.


5.28.2013

Shop Update


I just listed some new items in my etsy shop over Memorial Day.  I added a bunch of phone clutches and earbud cases.  I have more things to work on still so expect to see more things to appear in the shop.  I am building some custom shelving in my apartment for my vintage sheet storage, so I have a ton of sheets that will be for sale either on etsy, my blog, or Instagram coming up soon.

Strawberry Lemon Pops

I posted yesterday about Strawberry Mango Lemonade.  Today I'm bringing you another little summer treat idea.  I recently made some fruit pops because I saw some freeze pop molds at the dollar store and figured I could give it a try for only $1.  It's not like I wouldn't be getting any great use out of it.  We have hot summers here.

So I took to my trusty food processor (because my trusty blender isn't so trusty anymore now that it went ka-put).  I used my combination of strawberries and lemons again.


I chopped up a handful of strawberries, added some freshly squeezed lemon juice (one lemon is enough), and added a little water and honey all to my food processor.  I blended it all until it was pureed smoothly.  I then poured this mixture into my freeze pop mold, placed in the sticks, and froze them for hours.

These things are soooooo good!  All natural and super easy to make.  I think I will try adding fruit juice the next time I make fruit pops.  I'm definitely going to see how many different types of pops I can come up with before the end of summer!


This kiddie likes and so does her mama!!!  She couldn't wait to get out of school to have one.  I finally let her enjoy one, and she was so excited.

5.27.2013

Strawberry Mango Lemonade


If you follow me on Instagram, then you know that I have been on a bit of a natural food/beverage kick lately.  I've made everything from smoothies to detox water to homemade limeades.  I have made plain lemonade, but I wanted to have a drink with a little bit of a twist to it.  So I made Strawberry Mango Lemonade.  Here's how I did it.


I roughly chopped up some strawberries and a mango.  You could use frozen if you have it.  I then put it in my food processor.  Ordinarily I would puree it in my blender, but my blender decided to commit suicide not too long ago, therefore leaving me stuck with my food processor until I can get it fixed.  If you need to, add a little bit of water to your fruit blend.  Blend it as much as possible until it becomes uniform.  Add this mixture to your pitcher.  I used a regular quart-sized pitcher.  Add water about three-quarters of the way full.  I then juiced 3 lemons.  I could have used one or two extra, but I like the flavor it has.  Add a half cup to three-quarters cup of sugar.  Fill the remainder of the pitcher with water.  I topped it off with adding several lemon slices to the lemonade, so that when it chills the lemon-y flavor with infuse with the rest of the drink.


Wait until it gets cold for a couple of hours and then enjoy it on a nice, hot day as a cool and healthy refreshment!!


5.26.2013

Vintage Sheet Bunting (I Finally Jumped on the Bandwagon!)

As I mentioned in a previous post, I created a vintage sheet bunting banner for a quick little craft show I was participating in one afternoon.  I took some semi-decent photos of my little sign.


I used scraps of vintage sheets, alternating in pink and blue scheme, and some vintage twill tape.  The twill tape I found at an antique mall on a spool with hundreds and hundreds of yards on it. I ended up making the bunting with my embroidery machine because I was pressed for time.  I layered felt and vintage fabric, embroidered the shape, monogrammed my lettering, cut them out, and strung them together with the tape.  Such a cute little thing to make.  It was very personal and intimate to have it hanging at my table.  I'm building some new storage in my apartment for vintage sheets, and I'm thinking about hanging it from the shelving to make it feel more welcome.  Or maybe right about my sewing machine.  I'm still not quite sure yet.

I wish that I had chosen a better choice of thread to use for the letters.  By the way the banner spells "create." for the blog (of course!)  I thought since the fabrics had the mutual color of kiwi green in them that the green I chose would have been perfect.  The green ended up being to washed out and hardly noticeable.  It kind of bummed me out a little.  Next time I will have to make better contrasting decisions.

Either way it goes, I'm fairly happy with the result.  I thought about offering mini vintage sheet buntings in the shop with different sayings.  Hmm, still toying with that idea....

Printmaking at the Art Museum


I totally forgot that I had attended a printmaking class at Jule Collins Smith Museum of Fine Art last Thursday.

It was part of their Spring Semester of free classes and happened to be the last class of the semester.


It was such a fun event to go to.  I love art museums, well museums in general.  The instructor of the course is actually an art professor at Auburn University.  He also had two of his pupils in there assisting the class.


First, he schooled us on the history of printmaking.  Secondly, he explained to us the materials that went into the process.  Then, he roughly demonstrated the process.  After all was said and done, he released us to create our own bits of art.

It was so interesting to watch such an antiquated art form that has barely changed over the centuries be performed virtually the same way that it always has been.  I'm also glad that we didn't have to do any of the inking with the oil-based ink (whew!). 


This is my own personal work.  We used thin pieces of aluminum or tin to etch our drawings into.  I have an affinity for drawing eyes and faces.  If I can't think of anything else to draw, I will start sketching faces.  I love the detail and expression you can have with portraits.  I'm not super crazy about much of anything else.  I couldn't think of anything to etch, so I just went for what I knew.


When I was waiting to get my block inked, a few ladies asked if I was an artist.  I don't really consider myself an artist.  I just like to draw and design.  I've had enough formal training for it, so I guess I could be considered as one.  The thing is most of my friends are extremely good at drawing and painting, and we don't really formally call each other artists.  So needless to say, I replied that I dabble in drawing, nothing serious.

The next semester they offer these classes I am definitely going to keep my eyes peeled so that I may sign up.  I somehow always tend to miss the line up when it comes out. 


Friday Evening Pop-up Shop

**Just a little note: My computer has been on the fritz lately.  I have had the next few posts in the draft section for a while, as I am just now being to get it to cooperate. Thanks in advance for your understanding!**

A friend of mine usually tells me about these little pop-up markets that we have downtown at one of the strips of boutiques.  Last Friday night they decided to sort of randomly host one.  It's held in front of a tattoo parlor, bead/jewelry shop, upscale restaurant,  used bookstore/coffee shop, and recording studio.  It's the one part of town that is geared towards the more artsy community.

It was a perfect day for having the market.  It didn't rain despite the rain chances we had.  Nor was it deathly hot.  The pop-up shop ran from 3 until 7. Great timing!   There was just enough time to finish making more items, pick up Kelsey from school, and go home to finish preparing.  We had gotten there about a half hour after it  started.

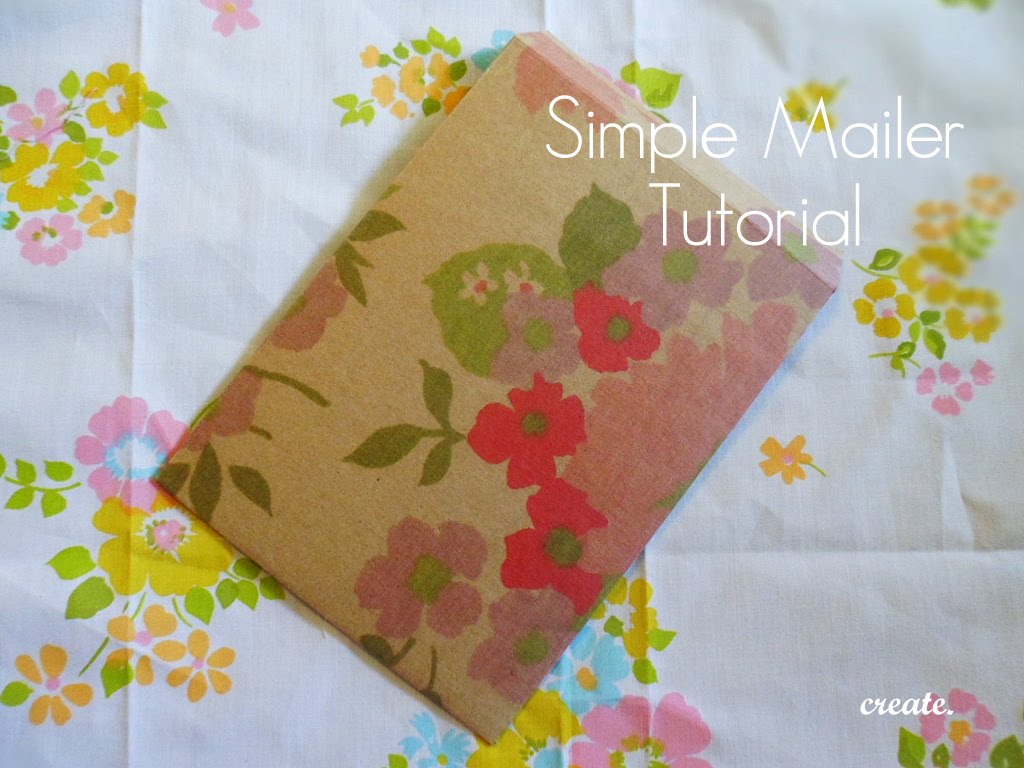
I whipped up a bunch of phone clutches and coin purses.  I brought some wallets, card wallets, and card holders.  I don't care how long you prepare for a craft show you will always feel like you aren't ready.


 I made myself a little bunting banner as well for a bit of signage.  I made the mini buntings out of vintage sheets, and I embroidered "create." on each pennant.  I made the pennants with my embroidery machine as well and stitched them together with some vintage twill tape.  I really like the effect of it.


My wee helper


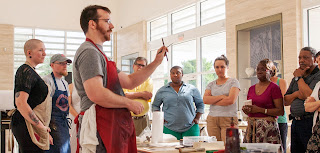
 They also had some nice entertainment.  There was this gentleman who was a one-man band that did some nice covers for some oldies.  He played the guitar and harmonica extremely well.  That is one thing I do like about Auburn; when they have events, they commission local musicians.  The musicians tend to be very folksy or soulful, just the music I like!!


I also nabbed a snapshot of this incredible string of lights that were overhead.  I thought they complemented the sky well, and it was such an earthy, organic feeling.  I always love to look at this string of beauties when I'm down at this little strip.


5.05.2013

Today...

I'm just dropping in to give you a glimpse of what I have planned today.  Not really a whole lot, but I am starting to tackle my horde of vintage sheets.  I'm finally going through the ones that I have at my home.  I still need to get the tons more that I left at my parents' house. Bleh! I hate trying to decide which ones I want to keep versus what I don't.  I have to keep reminding myself that I don't want my child(ren) to talk about me, though, if they have to have an estate sale after I'm dead.  It's better to purge now than then I suppose.

Enjoy your Sunday!

5.02.2013

KCWC 2013


     I'm very late with posting this for kcwc 2013.  I made one other piece as well that I will post later.  Anyway I whipped up this quick little blouse for my babes.  I bought the fabric from my local quilt shop.  It's Riley Blake's Song Bird by Carina Gardner.  I paired it with a navy and white chevron and navy and aqua chevron both also by Riley Blake.  I used the navy and aqua chevron to make bias tape for the arm holes and hem.  Funny thing about the bias trim: I made just over 2.5 yards of it and just barely had enough of it.  Fortunately I made it.


     I designed the shirt to be a bit A-line and a little of a tent blouse.  I added a keyhole button and loop closure in the back.  I embellished the front with multiple contrasting ruffles.  I also added a bit of elastic to the sides to cinch in the bodice to keep it from being so balloony.


     Before I forget: When I uploaded photos of this shirt to instagram, Elsie Marley was the first person to like my photo.  Talk about your excitement!!!!  I was super SUPER SUPER excited to see that.  No kidding!!!!  At any rate, what did you create for kcwc spring 2013?  I hope you were more productive than I was!