12.26.2011

{Tutorial}: Colorblock Clutch


As New Year's is rapidly approaching, I am creating as many things as I possibly can to make a handmade but cohesive New Year's Eve night. As I have afore-mentioned, nude/beige has become one of my favorite colors this season; and I think it looks wonderful paired with black. This color combo sparked my tutorial for today. So let's get started!

Materials

-2 different colors of vinyl
-Velcro or snaps
-Scissors or rotary cutter
-Sewing machine and matching thread
-Walking foot, Roller foot, Teflon foot, or Scotch tape and tissue paper


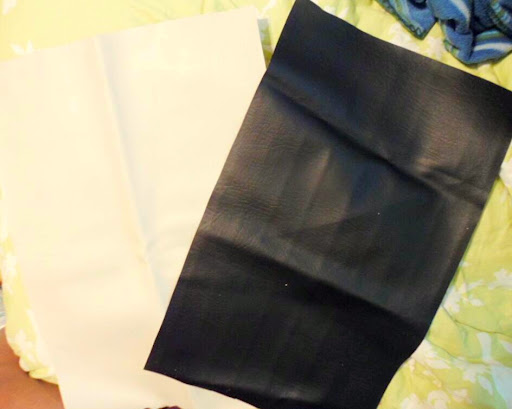
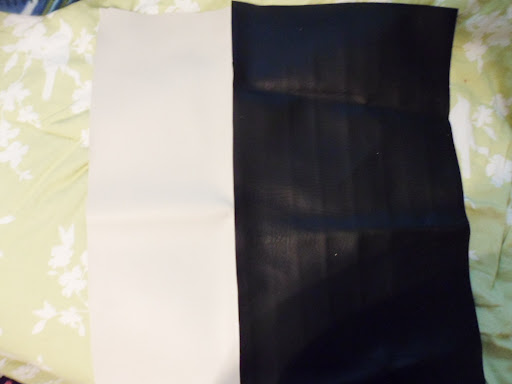
Decide how long you want you clutch to be and cut each piece
of fabric to that length. Now you can cut your fabric pieces the same width or cut one piece wider than the other. Totally your choice. I did one piece wider than the other since I was going for asymmetry.


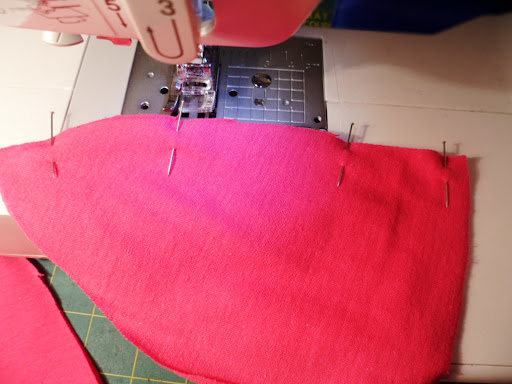
Stack one piece of vinyl on top of the other piece to get an idea of placement. Run a gluestick down the edge that will overlap so it won't slip. You can also add a little masking tape of these pieces.


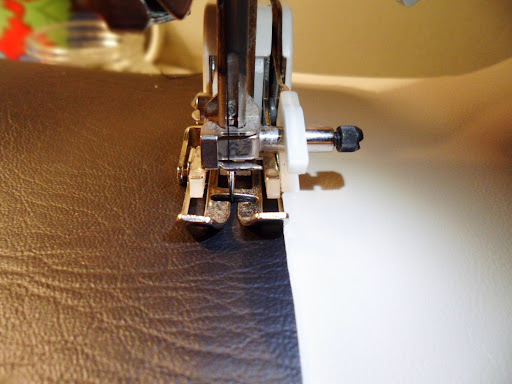
Stitch close to the edge of the overlapping piece. You can also run a second line of stitching close to that first line of edgestitching.


TIPS FOR SEWING VINYL:
-Use a Walking (Even-feed) foot, Roller Foot, or Teflon Foot if you have one available.
-If none of these feet are available, attach a piece of Scotch tape to the bottom of your regular presser foot so that the vinyl won't stick. Or place a piece of tissue paper on top of the vinyl and tear away once the stitching is complete.
-Never pin vinyl. It will leave holes. Instead hold pieces together with masking/painters tape, binder clips, or paper clips.
-Use a denim or leather needle, a longer stitch, and a looser tension. I usually set my stitch length to 4.5mm or longer and my tension at 3 or 4.
-Go slow and take your time. The slower you go the more control you will have over this tricky fabric.


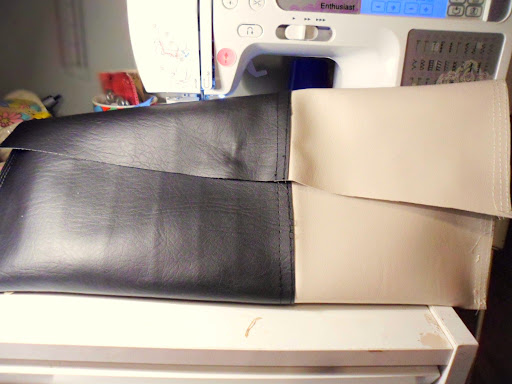
Square off all sides and figure how deep you want your clutch to be. Fold up the bottom edge and tape down.


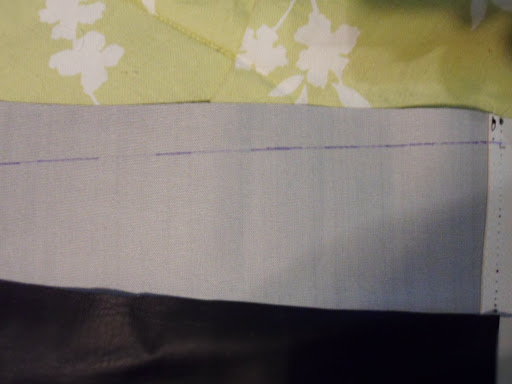
Optional: if you want an asymmetrical flap, then take a ruler and draw an angled line from left to right. Trim on this line.


Now edgestitch from bottom of clutch all the way to the top of the flap, making sure to match thread to the color vinyl you're using. I added a few more rows for decoration and reenforcement.


Attach velcro with a strong glue or stitch it on or attach snaps according to manufacturer's instructions.


back


front


If you make one, send me pictures!!

12.24.2011

Holiday Nails


I decided to go with something a little simple this Holiday season for my manicure. I am absolutely in love with all things nude: from polish to lipstick to clothing and shoes. So I figured why not do a simple yet bold nude nail for Christmas and New Year's?

I used Wet 'n Wild's "Private Viewing." A friend of mine turned me on to this particular color when I was searching for a plain flesh-toned nude. I also used Sally Girl's gold glitter polish. I just brushed the glitter polish on in an asymmetrical pattern across my tips. I love the affect and how the light catches the glitter. Almost reminds me of gold leafing.

What I like about "Private Viewing" is, of course, the particular hue; the drying time isn't bad, and the shortness of the brush.
What I don't like about it is the material of the brush bristles (it's something manmade so it's thick and stiff) and the unevenness of the bristles causing the polish to be streaky when applied.

But all and all I made it work. So now I'm off to find nude pumps and more black eyeshadow....

Have a wonderful Christmas Eve and be careful!!!
Love you guys!!

12.18.2011

{Tutorial}: Braided Jersey Hat


Winter is on its way here in the South; and, although it has been fairly mild, I have one huge problem when the temperature starts to drop: my head freezes and I can never find my hat. Unfortunately I keep my hair short in the winter months as well, and I seem to purchase a new cap every year. I have the worst luck with those things!

Well have decided that instead of shelling out a few bucks here and there every few month, I will just make one. Who knew that you could also sew a neat little cap? I want to share my cloche-inspired design.
Let's go!

Materials
-1/3 jersey fabric or t-shirt
-scrap fabric for embellishment
-buttons for embellishment (optional)
-sewing machine and needle and thread to match
-hat template (This one is a pretty general size for adults, but you can enlarge/reduce as needed.)

All seams are sewn with a 1/4 inch allowance unless otherwise stated.

Print out template. Fold your jersey fabric in half twice or enough times so that you have 4 layers of fabric. Pin template to fabric and cut out.


Take 2 of your hat pieces and pin them right sides together.


Select straight stitch on your machine. I chose a width of 2.0 and a length of 3.0. You could also use a regular straight stitch with a stitch length of 3.0 and slightly stretch as you sew.

Seams should look somewhat like this. Repeat with the remaining 2 pieces.


Once both sides are done, place both halves together right sides facing and stitch.


Now turn the bottom edge up an inch to the wrong side, pin, and hem 5/8" from edge.


Head back to your fabric and cut a long strip (at least 40 or so inches) and about 5 or 6 inches wide. Then cut that strip into 3 separate lengths. Try to make them more or less equal, but it doesn't have to be exact. Stack the 3 strip on top of each other and fold over to the wrong side about 1/2" and stitch down.


Plait the cording you just made down till the end and stitch across the rope to secure your braid.


Trim close to stitching.


This part is about personal preference. I didn't mind having one of the seams being a front center one. So decide where you want the front center to be on your cap and mark it for reference. Start pinning your braided trim to the far left or far right of that point. Basically you want to start pinning your trim somewhere between the front center and the side center of your cap, just to give your embellishment an assymetrical placement. Make sure you place the trim on top of the hemline.


Set your machine to a 3-step zigzag stitch, and set the stitch width and length to the longest they can go. Starting at the edge, start stitching and slighty stretching as you sew. You should barely notice the zigzag stitch because it almost emulates the weave of the braid.


For Dora's cap, I cut 6 or 7 flowers from the knit, stacked them on top of another, and handstitched them where the ends of the braid meet. I, then, added a button to the center of the flower.

For my cap, I covered 2 buttons with scrap fabric, cut a little rectangle from jersey and formed a bow, handstitched the bow and button where the braid meets, and handstitched another button to the center top of the cap for a beanie feel.


Thanks for looking!

Sew, Mama, Sew! Giveaway Winners

The winners for the sling bag and tote bag are CMG and @pril. Congratulations ladies! And I want to thank all of you for participating! This would not have been possible without you all. Thanks and stay tuned for more giveaways.

12.13.2011

Shop update


Letting you all know that I added some Itty Bitty Stockings to my shop. I am also offering custom orders with these if you need some for party favors or garlands our what have you. So go by createbylani today to check them out.

12.11.2011

Sew Mama Sew! Giveaway Day


Have you heard about Sew Mama Sew! Giveaway Day? It's a whole gang of people linking up their crafty bits to give away to whomsoever browses through. It's like Christmas...right before Christmas!!

Well guess what?! I'm participating! Here's what 2 lucky readers will receive:


One will receive a tote bag and the other will win a double zipper sling bag. Giveaway is open to US residents at this time. Giveaway is open from Dec. 12 until Dec. 16 at 7 p.m. CST and winners will be announced on this post.

All you need to do to qualify is reply to this question on THIS POST: What do you prefer receiving on Christmas, handmade or store-bought gifts?
That's all! So check out Sew Mama Sew for all the other wonderful giveaways that will be going on tomorrow. I think they will start the link-up early early in the morning! Good luck and enjoy!!

Pretty Little Stockings

I have been on a digitizing and embroidering kick lately. I have slowly been trying to encourage myself to sew more, but all it seems I can do is whip out embroidery machine designs and stitch them out by the half dozens. Well at least I'm doing something creative. I mean it kinda is sewing....

Today I digitized a cutesy little Christmas stocking. Let me correct that a cutesy teeny Christmas stocking. It measures about 3.75 inches by 3.75 inches at its widest points. The opening of the boot is 2.5 inches wide, leaving just enough space to fit a gift card down into.


I've cranked out 7 of these so far. Two of them I forgot to add hangers to... Oops!


These will make cute gifts for classes of little kids, gift card holders, ornaments, or as actually stockings to stuff little trinkets in. They are quilted and made all in the embroidery machine without any extra sewing. I'm actually getting pretty good at this digitizing stuff. And they don't take long to stitch out, just a couple of minutes.


I made them with vintage sheet scraps and a little bit of batting. I think I may piece together some vintage sheet scraps to make them patchwork.


I'll be adding a few to the shop soon.

What have you created for Christmas lately?